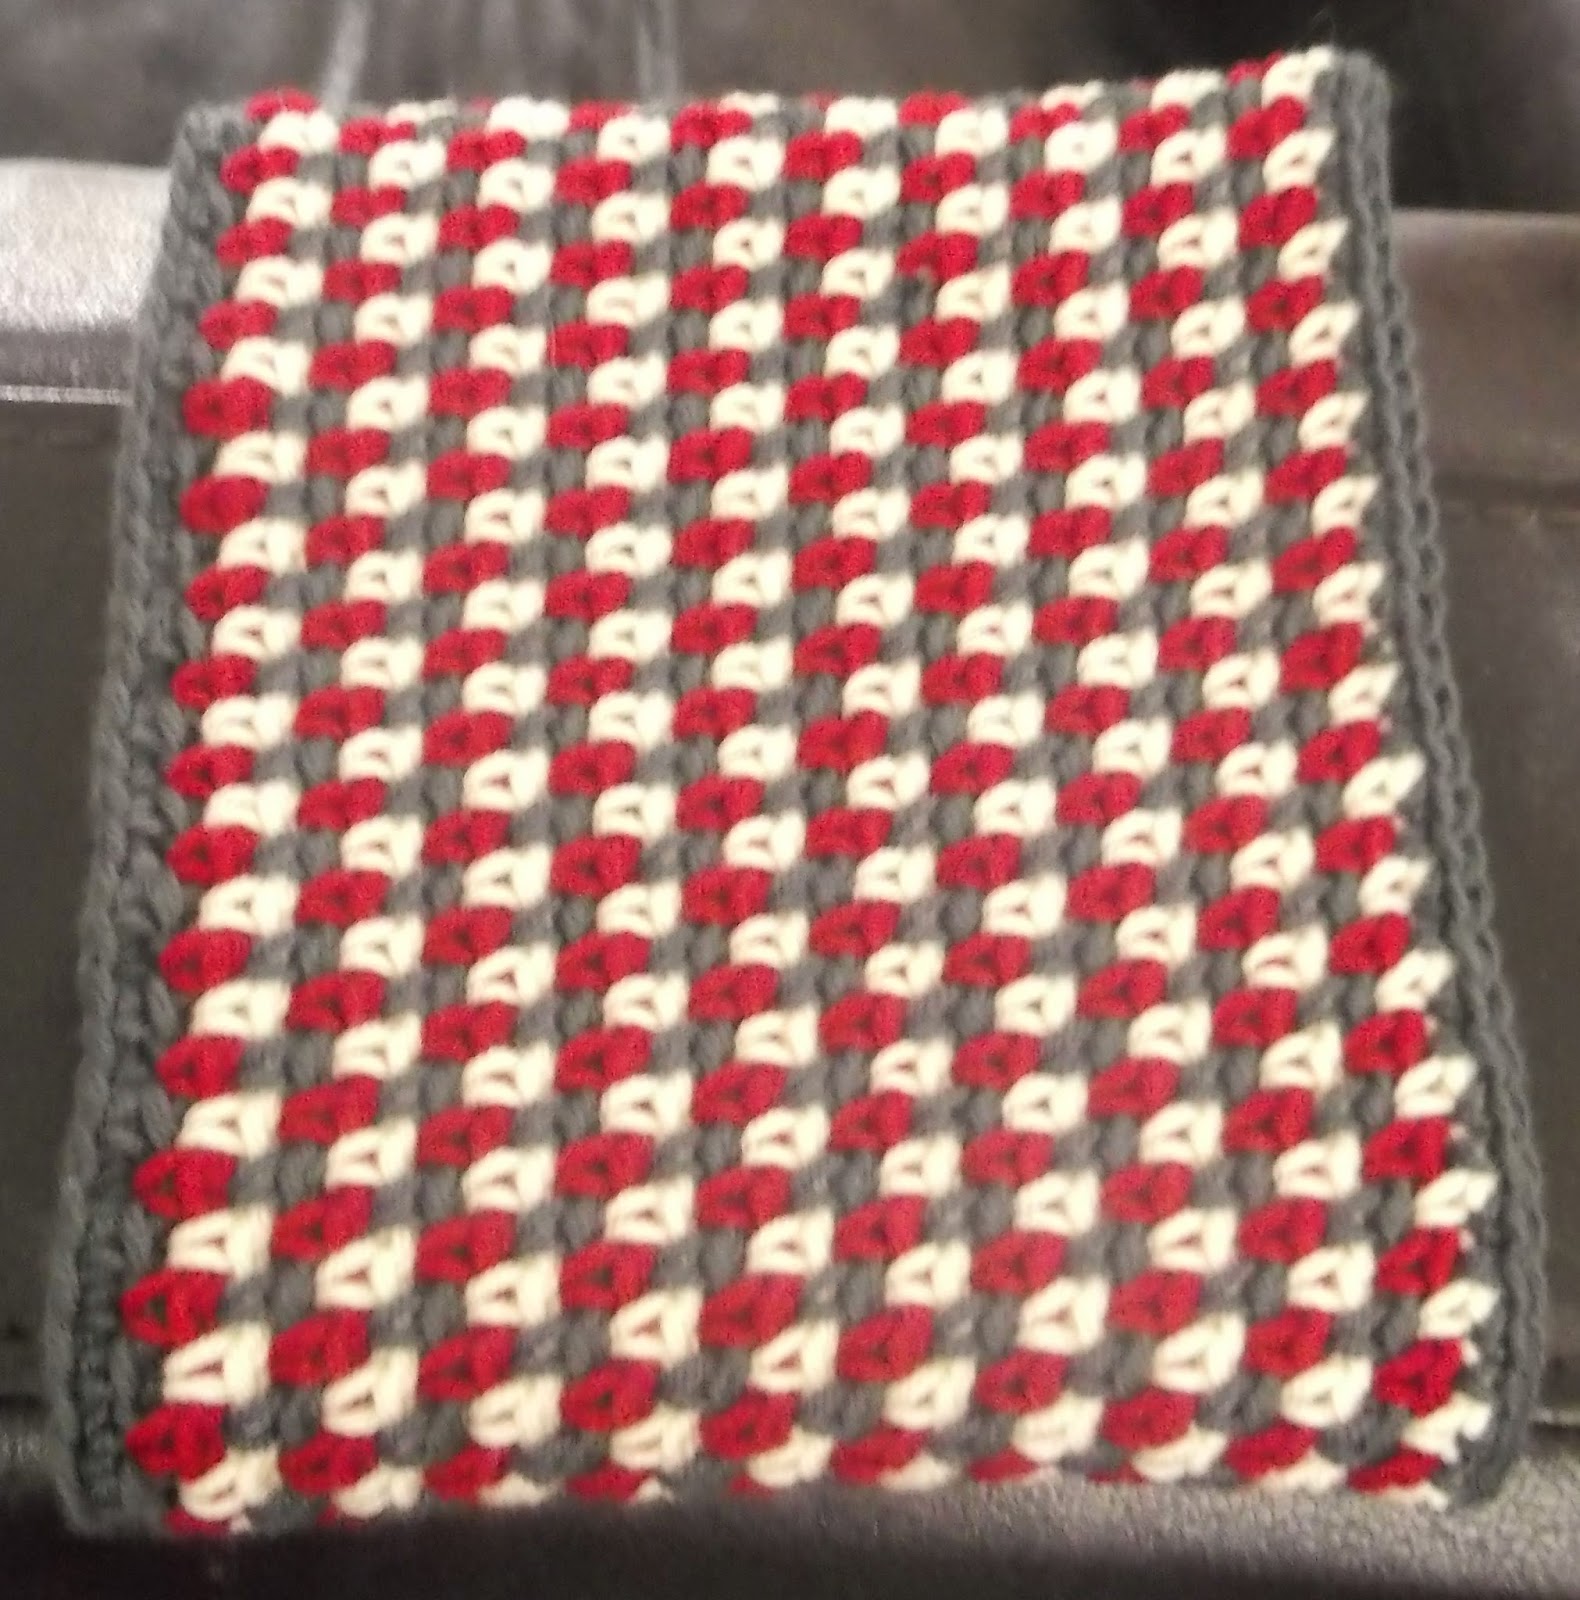
Tumbling Block Dishcloth
You will need:
4.5mm hook
3 contrasting cotton scraps (10g/8.5m of each (I used Drops Loves You 8/8 Cotton))
Darning needle
All stitches are made in front loop only (FLO). Feel free to experiment with working your stitches front loop only, back loop only, standard sc (through both loops) or a combination of all three! I have gone for front loop only here for a big surface area, but the choice is yours. Happy dishwashing!
First segment:
1. (RS) Ch16, sc in 2nd ch from hook and each ch across, turn (15sc)
2. Ch1, 2sc (FLO) in first st, sc (FLO) across to last two sts, sc2tog (FLO), turn (15sc)
3. Ch1, sc2tog (FLO), sc (FLO) across to last st, 2sc (FLO) in last st, turn (15 sc)
4 - 15: Repeat row 2-3 6 times, fasten off.
2nd segment:
1. With RS facing, join second colour yarn in top left st, ch1. Working across each row end, sc in each row to end, turn (15sc)
2. Ch1, sc2tog (FLO), sc (FLO) across to last st, 2sc (FLO) in last st, turn (15 sc)
3. Ch1, 2sc (FLO) in first st, sc (FLO) across to last two sts, sc2tog (FLO), turn (15sc)
4 - 15: Repeat row 2-3 6 times, fasten off.
3rd segment:
1. With segment 2 RS facing, join third colour yarn in top right of segment 2, ch1. Working across each row end, sc in each row to end, turn (15sc)
2. Ch1, sc2tog (FLO), sc (FLO) across to last st, 2sc (FLO) in last st, turn (15 sc)
3. Ch1, 2sc (FLO) in first st, sc (FLO) across to last two sts, sc2tog (FLO), turn (15sc)
4 - 15: Repeat row 2-3 6 times, fasten off, leaving an 18" tail. Your choice either to whip stitch the remaining edges of segment 3 and segment 1. Alternatively, you could slip stitch them together.
Optional edging: rejoin yarn (any colour) in any corner stitch, sl st evenly around all sides. After last st, ch 20 and sl st in first st made, fasten off. Weave in ends.
Once your dishcloth is worn out, it could be torn up and composted (100% cotton yarns)
Saturday, 29 February 2020
Monday, 14 December 2015
office block cowl
I had some left overs from another project, fiddled around with the Autumnal Cowl pattern and came up with this!
Slightly larger at approx 23" around, 6" high
You will need:
5.5mm hook
50g (approx) single colour yarn (I used cascade 220 worsted weight)
25g approx hand dyed aran (worsted) weight yarn
Stitch marker (optional)
Notes on the pattern:
Pattern begins:
1, With MC, ch 100, sc in 2nd ch from hook and each st across. Ch1 (not to turn) and making sure not to twist sc in second sc of the first row to create a loop
Slightly larger at approx 23" around, 6" high
You will need:
5.5mm hook
50g (approx) single colour yarn (I used cascade 220 worsted weight)
25g approx hand dyed aran (worsted) weight yarn
Stitch marker (optional)
Notes on the pattern:
- I changed colour by completing the first part of the sc in the working yarn, then changing to the next colour by doing the YO and pull through with it and dropping the working yarn
- I worked in the round (continuous rounds without joining) so the cowl is effectively a spiral.
- To line up the colour changes I worked the last stitch in the first ch sp for the hand dyed. For the main colour I worked three rounds, the last stitch was effectively the first stitch of the fourth round. I counted 4 stitches on the diagonal ahead of where I was working.
- Carry the yarn you are not working up the inside of the cowl to save on sewing in ends!
Pattern begins:
1, With MC, ch 100, sc in 2nd ch from hook and each st across. Ch1 (not to turn) and making sure not to twist sc in second sc of the first row to create a loop
(You might prefer to work 99 FSC or to join the chain at 99 sts and work in the round from the start. I always get in a tangle so I don't!)
2. Work *ch1, sk sc, sc in next sc* around, work first part of last sc in first ch of last round, change colour and finish sc
3. With CC, work *ch1, sk sc, sc in ch sp* around, work first part of sc in first ch of previous round, change to MC and finish sc
From here you will be working 3 rounds in MC (in my case blue) then 1 round in CC (yellow/green/blue hand dyed). Continue until you have 7 rows of CC
Last 2 rows:
28: (MC) *ch1, sk sc, sc in ch sp* around
29: (MC) sc in each ch sp and sc around. Sl st for two or 3 sts before fastening off, weave in ends.
Thursday, 19 November 2015
Aubergine Shopping Bag
I've been working on this handy shopping bag pattern for a while. It uses one and a half skein of King Cole Bamboo Cotton yarn (100g per skein, dk, 230 metres) and a 4.5mm hook. Try sizing up the hook to create a bigger bag (remember to allow for extra yarn!), or re-imagine the simple base as a doily pattern... Try using up scraps from other projects too.
Pattern begins:
1. Ch3, work 12dc in 3rd ch from hook, sl st to top of first dc to join (12)
2. Ch2 (does not count as stitch), 2dc in each st around, join with sl st in first dc (24)
3. Ch2, *2dc, dc* around, sl st in top of first dc (36)
4.. Ch2, *2dc, dc in next 2 sts* around, sl st to join (48)
5. Ch2, *2dc, dc in next 3 sts* around, sl st to join (60)
6. Ch2, *2dc, dc in next 4 sts* around, sl st to join (72)
7. Ch2, *2dc, dc in next 5 sts* around, sl st to join (84)
You may add extra inc rounds here by following the pattern.
Begin sides:
1. Ch2 (does not count as st), *[dc, ch1, dc] in same sp, sk 2, [2dc, ch1, 2dc], sk2* around, sl st to top of first dc to join
2. Sl st across to ch sp, [2dc, ch1, 2dc] in ch sp, sk sts to next ch sp, [dc, ch1, dc], sk sts to next ch sp* around, sl st in top of first dc to join.
3. Sl st across to ch sp, [dc, ch1, dc] in ch sp, sk sts to next ch sp, [2dc, ch1, 2dc] in ch sp, sk sts to next ch sp* around, sl st in top of first dc to join.
Repeat rows 2-3 until you are happy with the height (mine is 26 rows total)
Edging:
1. Sl st to 2nd dc of [2dc, ch1, 2dc] group, ch1, *sc in same space, sc around ch, sc in next dc, sk last dc of group, sc in next dc, sc around ch sp, sc in dc, sk first dc of next group*, cont in pattern around, sl st to join (84)
2. Ch1, hdc in each st around, sl st to join
3. Ch1, sc around, sl st to join, fasten off and weave in ends.
Tunisian handles
1. Rejoin yarn in 8th st from start. Pick up sts in the next 6 sc (7 loops on hook), return pass.
2-29 Tunisian simple st in each st across, ret pass.
At this point either tunisian bind off, skip 14 sts and whip stitch to next 7 (matching sts).
Or, skip 20 sts, holding WS tog and with tunisian handle towards you (bag behind), slst tog 21st st and beginning loop, sl st tog next 6 sts, fasten off.
1. Counting around, sk 14 more sts, rejoin yarn with sl st. Pick up sts in the next 6 sts, ret pass.
2-29. Tunisian simple st in each st across, ret pass.
Join end of strap to body of bag in the same way again.
Sew in ends and go shopping!
Pattern begins:
1. Ch3, work 12dc in 3rd ch from hook, sl st to top of first dc to join (12)
2. Ch2 (does not count as stitch), 2dc in each st around, join with sl st in first dc (24)
3. Ch2, *2dc, dc* around, sl st in top of first dc (36)
4.. Ch2, *2dc, dc in next 2 sts* around, sl st to join (48)
5. Ch2, *2dc, dc in next 3 sts* around, sl st to join (60)
6. Ch2, *2dc, dc in next 4 sts* around, sl st to join (72)
7. Ch2, *2dc, dc in next 5 sts* around, sl st to join (84)
You may add extra inc rounds here by following the pattern.
Begin sides:
1. Ch2 (does not count as st), *[dc, ch1, dc] in same sp, sk 2, [2dc, ch1, 2dc], sk2* around, sl st to top of first dc to join
2. Sl st across to ch sp, [2dc, ch1, 2dc] in ch sp, sk sts to next ch sp, [dc, ch1, dc], sk sts to next ch sp* around, sl st in top of first dc to join.
3. Sl st across to ch sp, [dc, ch1, dc] in ch sp, sk sts to next ch sp, [2dc, ch1, 2dc] in ch sp, sk sts to next ch sp* around, sl st in top of first dc to join.
Repeat rows 2-3 until you are happy with the height (mine is 26 rows total)
Edging:
1. Sl st to 2nd dc of [2dc, ch1, 2dc] group, ch1, *sc in same space, sc around ch, sc in next dc, sk last dc of group, sc in next dc, sc around ch sp, sc in dc, sk first dc of next group*, cont in pattern around, sl st to join (84)
2. Ch1, hdc in each st around, sl st to join
3. Ch1, sc around, sl st to join, fasten off and weave in ends.
Tunisian handles
1. Rejoin yarn in 8th st from start. Pick up sts in the next 6 sc (7 loops on hook), return pass.
2-29 Tunisian simple st in each st across, ret pass.
At this point either tunisian bind off, skip 14 sts and whip stitch to next 7 (matching sts).
Or, skip 20 sts, holding WS tog and with tunisian handle towards you (bag behind), slst tog 21st st and beginning loop, sl st tog next 6 sts, fasten off.
1. Counting around, sk 14 more sts, rejoin yarn with sl st. Pick up sts in the next 6 sts, ret pass.
2-29. Tunisian simple st in each st across, ret pass.
Join end of strap to body of bag in the same way again.
Sew in ends and go shopping!
Wednesday, 16 September 2015
20% off in my Ravelry store!
Just a quick post to let you all know that there is 20% off in my Ravelry store with the code AUTUMN - there is a definite chill in the air here lately and it is time to start curating project lists and planning the winter's crafting!
Here's the link - happy crafting! redclovercrochet Ravelry store
Monday, 31 August 2015
Puff stitch coasters/scrubbies
It's been a while since I posted any new patterns here. I have been busy recently volunteering with a local wildlife group and starting to think seriously about my career now the kids are growing up a little. I've also found myself short of funds so I've had to come up with some thriftier ideas, using up left over scraps and clearing some space in the stash!
I have lots of small amounts of cotton and bamboo yarn left over from other projects so I came up with these versatile little puff stitch confections. They could be used as coasters for drinks, in the bath or shower, for dishwashing... By extending the pattern out a little further they would also make handy pot holders/trivets for the kitchen too maybe. Or you could go crazy and make a bath/shower mat version, or even a throw or blanket!
Coasters measure 3 1/2" across.
For the coasters, you will need
Beg puff stitch group: ch2, *yarn over, insert in stitch and draw up a loop* 3 times, yarn over and draw through all loops on hook, ch2, puff st
Puff stitch: *yarn over, insert in stitch and draw up a loop* 4 times, yarn over and draw through all loops on hook
Beg puff stitch group: ch2, *yarn over, insert in stitch and draw up a loop* 3 times, yarn over and draw through all loops on hook, ch2, puff st
Puff st group: Puff st, ch2, puff st in same space
Puff st inc: Puff st, ch2, puff st, ch2, puff st in same space
Beg puff st inc: beg puff st group, ch2, puff st (3 puff st, 2 ch sps)
By alternating where you put the increase in each round you can avoid your coaster becoming too boxy, in this pattern I have alternated putting the inc at the beginning and end of each 'phrase'.
Pattern begins:
I have lots of small amounts of cotton and bamboo yarn left over from other projects so I came up with these versatile little puff stitch confections. They could be used as coasters for drinks, in the bath or shower, for dishwashing... By extending the pattern out a little further they would also make handy pot holders/trivets for the kitchen too maybe. Or you could go crazy and make a bath/shower mat version, or even a throw or blanket!
Coasters measure 3 1/2" across.
For the coasters, you will need
- 8-10g (25 metres or so) of dk weight cotton, bamboo, linen, or even wool (although be careful of washing instructions!)
- 4mm hook
- darning needle
Beg puff stitch group: ch2, *yarn over, insert in stitch and draw up a loop* 3 times, yarn over and draw through all loops on hook, ch2, puff st
Puff stitch: *yarn over, insert in stitch and draw up a loop* 4 times, yarn over and draw through all loops on hook
Beg puff stitch group: ch2, *yarn over, insert in stitch and draw up a loop* 3 times, yarn over and draw through all loops on hook, ch2, puff st
Puff st group: Puff st, ch2, puff st in same space
Puff st inc: Puff st, ch2, puff st, ch2, puff st in same space
Beg puff st inc: beg puff st group, ch2, puff st (3 puff st, 2 ch sps)
By alternating where you put the increase in each round you can avoid your coaster becoming too boxy, in this pattern I have alternated putting the inc at the beginning and end of each 'phrase'.
Pattern begins:
- Ch5, sl st to form loop. Beg puff stitch inc, puff st inc twice, sl st in top of first puff st (9 puffs, 6 ch sp).
- Sl st across to ch sp. Beg puff st group, puff st inc in next ch sp, *puff st group, puff st inc* twice, sl st to top of first (15 puffs, 9 ch sps)
- Sl st across to ch sp. Beg puff st inc, puff st group in each of the next 2 ch sp, [puff st, inc, *puff st group* in each of the next 2 ch sp] twice, sl st in top of first (21 puffs, 12 ch sp)
- Sl st across to ch sp. Beg puff st group, puff st group in each of the next 2 ch sp, puff st inc in next ch sp, [puff st group in each of the next 3 ch sp, puff st inc] twice, sl st in top of first to join.
Tuesday, 14 April 2015
Beaded Net Curtains - yes, really!
Oh yes I did. I finally got sick of looking at the grubby old nylon things hanging at the windows so I thought I should make some of my own.
These are based on my favourite stitch pattern, I've heard it called linen stitch, granite stitch, grit stitch... in any case it creates a wonderfully floaty light fabric. So I knew it would need some beads to hold it in place!
I had some left over Mill Hill beads in gold and lilac from other projects (about 3/4 of a pack of each). I chose to add 3 or 4 beads every 3 or 4 rows, starting on row 11. You can just about see them in the second pic!
For yarn, I picked up 2 skeins of my favourite yarn from the LYS in town - King Cole Bamboo Cotton 4 ply. I used around 75g for each curtain.
Each curtain measures 14" width, 38" drop.
Pattern
You will need:
1. With the smaller hook, fsc 78 (or an even number of fsc to fit) (or ch an odd number, sc in 2nd ch from hook - to give an even number of sc), turn. Change up to larger hook
2. Ch1, *sc, ch1, sk1* across, sc in last 2, turn
3 - 10: Repeat row 2
11. Repeat row 2 but add 3 or 4 randomly spaced beads to sc stitches on row, turn.
Continue in pattern: 3 plain rows, 1 beaded row until you reach the length you want. After blocking, 2 rows will measure approx. 1". So my curtains have 75 rows made on the larger hook for 36" length (excl ending loops).
You may choose to add more beads per row lower down.
Finishing rows:
Change back to the smaller (4.5mm) hook, ch1, work 1 sc in each sc and each ch across, turn.
Add a border of your choice - maybe in a contrasting colour. I went for a simple loopy border of 9 chs evenly spaced with a bead in the fifth ch. You could add a filet border, a pineapple border... or even a border borrowed from a pretty shawl.
When the border is finished, fasten off and weave in ends. Rejoin yarn in other side of fsc (smaller hook!). Ch1, sc, *sc, ch3, sc in next, sc* across to end, sc if yo are left with an odd stitch. Fasten off.
Wet block to size, hang and enjoy the morning sun catching the beads!
These are based on my favourite stitch pattern, I've heard it called linen stitch, granite stitch, grit stitch... in any case it creates a wonderfully floaty light fabric. So I knew it would need some beads to hold it in place!
I had some left over Mill Hill beads in gold and lilac from other projects (about 3/4 of a pack of each). I chose to add 3 or 4 beads every 3 or 4 rows, starting on row 11. You can just about see them in the second pic!
For yarn, I picked up 2 skeins of my favourite yarn from the LYS in town - King Cole Bamboo Cotton 4 ply. I used around 75g for each curtain.
Each curtain measures 14" width, 38" drop.
Pattern
You will need:
- 4.5mm hook
- 9mm hook
- small (0.6mm ish) hook for beading
- blocking equipment
- 2 skeins of 4ply cotton or cotton/bamboo or even wool if your heart desires! I used a cotton/bamboo blend with 371m (400yd) per 100g
1. With the smaller hook, fsc 78 (or an even number of fsc to fit) (or ch an odd number, sc in 2nd ch from hook - to give an even number of sc), turn. Change up to larger hook
2. Ch1, *sc, ch1, sk1* across, sc in last 2, turn
3 - 10: Repeat row 2
11. Repeat row 2 but add 3 or 4 randomly spaced beads to sc stitches on row, turn.
Continue in pattern: 3 plain rows, 1 beaded row until you reach the length you want. After blocking, 2 rows will measure approx. 1". So my curtains have 75 rows made on the larger hook for 36" length (excl ending loops).
You may choose to add more beads per row lower down.
Finishing rows:
Change back to the smaller (4.5mm) hook, ch1, work 1 sc in each sc and each ch across, turn.
Add a border of your choice - maybe in a contrasting colour. I went for a simple loopy border of 9 chs evenly spaced with a bead in the fifth ch. You could add a filet border, a pineapple border... or even a border borrowed from a pretty shawl.
When the border is finished, fasten off and weave in ends. Rejoin yarn in other side of fsc (smaller hook!). Ch1, sc, *sc, ch3, sc in next, sc* across to end, sc if yo are left with an odd stitch. Fasten off.
Wet block to size, hang and enjoy the morning sun catching the beads!
Thursday, 27 November 2014
Blackberry Smoothie headband
When creativity strikes I usually end up working on half a dozen new patterns at once. One maybe two of those ideas will then make it to the point of being written up. This last couple of weeks I have been working on some Tunisian crochet ideas and a couple of days ago I finished a rough draft of a tunisian hat. It needs some refining to make the numbers add up but it may well make it to being written up properly!
Just as I had finished, a couple of people asked me to make them a headband to keep their ears warm. I love the fit of the Tunisian knit stitch band so I upped the stitch count a little and came up with this:
Snug and cosy! The yarn is superwash merino so easy care (yay!) aaaaand the headband should keep it's shape pretty well too. I managed to get 2 of these out of a 50g (165m/180yd) skein of sportweight merino. However the pattern works as well in dk weight too :)
Finished size: 15" around (to fit a 22" head) 3.5" wide
You will need:
Stitches used: This piece is worked in Tunisian knit stitch (TKS). To make the stitch, push hook between the two vertical bars in the stitch you are working into, and pull up a loop. Continue across like this - in the last (end stitch) pull up a loop as normal.
Return pass: YO, pull through first, *YO pull through 2* across until one loop remains. Start next row!
1. Ch 20
2. Forward pass, return pass
3. TKS in each stitch across, return pass.
Repeat row 3 until piece measures approx. 15" (mine is 86 rows total). With right sides facing each other, sl st together matching stitches. Fasten off and weave in ends.
Or if you prefer, work a Tunisian bind off row to finish and whip stitch together.
You could add buttons or crochet flowers to decorate.
Repeat row 3 until headband reaches size required. Mine are 86 rows long for a 22" head.
Snug and cosy! The yarn is superwash merino so easy care (yay!) aaaaand the headband should keep it's shape pretty well too. I managed to get 2 of these out of a 50g (165m/180yd) skein of sportweight merino. However the pattern works as well in dk weight too :)
Finished size: 15" around (to fit a 22" head) 3.5" wide
You will need:
- 50g sport weight merino (I used Katia Merino Baby in purple)
- 5mm hook (standard length is fine, all the stitches will fit!)
- darning needle to weave in ends
Stitches used: This piece is worked in Tunisian knit stitch (TKS). To make the stitch, push hook between the two vertical bars in the stitch you are working into, and pull up a loop. Continue across like this - in the last (end stitch) pull up a loop as normal.
Return pass: YO, pull through first, *YO pull through 2* across until one loop remains. Start next row!
1. Ch 20
2. Forward pass, return pass
3. TKS in each stitch across, return pass.
Repeat row 3 until piece measures approx. 15" (mine is 86 rows total). With right sides facing each other, sl st together matching stitches. Fasten off and weave in ends.
Or if you prefer, work a Tunisian bind off row to finish and whip stitch together.
You could add buttons or crochet flowers to decorate.
Repeat row 3 until headband reaches size required. Mine are 86 rows long for a 22" head.
Monday, 15 September 2014
Rustic Wrap Cardi
I was having a sort through my stash at the weekend. I'm pleased to report I've now made a reasonable dent in it and I've managed to clear a whole trug! While I was going through everything I found a few yarns I had left over from my cloth nappying days and thought I should make something with it. I wanted a cardigan pattern but as is so often the case, I couldn't find exactly what I was looking for, so I came up with my own pattern.
The finished cardi has a 24" chest (approx age 5), if you need to adjust this you could add a couple more chains when you form armholes.
You will need:
6.5mm hook
300g worsted/aran or bulky weight yarn. The original is made with Arucania Magallenes which is a thick and thin slubby-esque yarn.
4 stitch markers
1. Ch51, dc in 3rd ch from hook (turning ch does not count as stitch here or throughout) and each st across, turn (49)
2. Ch2 (doesn't count!) 2dc in first st, dc in each stitch across, 2dc in last, turn (51)
3. Ch2, 2dc in first, dc in next 11, 3dc place marker in first and 3rd stitches just made, dc in next 25 sts, 3dc place marker in first and 3rd sts just made, dc in next 11, 2dc in last, turn (57)
4. Ch2, 2dc in first, dc to first marked st, *3dc in marked st, move marker to first st of cluster, dc to next marked st 3dc in marked st, move marker to third st of cluster, * dc to next marked st, rep **, dc to last, 2dc in last, turn (67)
5-10. Repeat row 4, increasing by 10 stitches on each row > (77, 87, 97, 107, 117, 127)
To form armholes:
11. Ch2, 2dc in first, dc to first marked st, ch2, sk both marked sts and those in between and rejoin with a dc in st after second marked st, dc across to third marked st, ch2, sk both marked sts and those in between and rejoin with a dc in st after fourth marked st, dc to last, 2dc in last, turn. (71)
Leave markers in to help you see where you need to work when you join the sleeves.
12. Ch2, 2dc in first, dc to last (remember to work a dc in each ch under arm (2dc in each ch2 sp), 2dc in last, turn (73)
13- 28: Repeat row 12
Do not fasten off!!
Finishing round: turn your work to work along side of front up towards neck band, ch1, work 2sc in each dc row end to first neck corner, work 3dc in corner st, sc in each st around neck, 3sc in next corner sp, 2sc in each dc row end to next corner, 3sc in corner sp, sc in each st to last corner, 3sc in last corner, join with a sl st, fasten off and sew in ends.
To work sleeves, make sure you working in the opposite direction to previous yoke row!
1. Join with a sl st in one of the ch sps under arms, ch2, dc in same sp, dc2tog across dc row end and marked st (remove marker), dc in each st around to marked st, work dc2tog across marked st and dc row end, dc in other ch sp, sl st to join round, turn. (33)
2-19: ch2, dc in each st around, join with a sl st in top of first st of round, turn (33)
Fasten off, weave in ends, sew on buttons! There are no buttonholes in this pattern, just use the holes in the fabric.
You will need:
6.5mm hook
300g worsted/aran or bulky weight yarn. The original is made with Arucania Magallenes which is a thick and thin slubby-esque yarn.
4 stitch markers
1. Ch51, dc in 3rd ch from hook (turning ch does not count as stitch here or throughout) and each st across, turn (49)
2. Ch2 (doesn't count!) 2dc in first st, dc in each stitch across, 2dc in last, turn (51)
3. Ch2, 2dc in first, dc in next 11, 3dc place marker in first and 3rd stitches just made, dc in next 25 sts, 3dc place marker in first and 3rd sts just made, dc in next 11, 2dc in last, turn (57)
4. Ch2, 2dc in first, dc to first marked st, *3dc in marked st, move marker to first st of cluster, dc to next marked st 3dc in marked st, move marker to third st of cluster, * dc to next marked st, rep **, dc to last, 2dc in last, turn (67)
5-10. Repeat row 4, increasing by 10 stitches on each row > (77, 87, 97, 107, 117, 127)
To form armholes:
11. Ch2, 2dc in first, dc to first marked st, ch2, sk both marked sts and those in between and rejoin with a dc in st after second marked st, dc across to third marked st, ch2, sk both marked sts and those in between and rejoin with a dc in st after fourth marked st, dc to last, 2dc in last, turn. (71)
Leave markers in to help you see where you need to work when you join the sleeves.
12. Ch2, 2dc in first, dc to last (remember to work a dc in each ch under arm (2dc in each ch2 sp), 2dc in last, turn (73)
13- 28: Repeat row 12
Do not fasten off!!
Finishing round: turn your work to work along side of front up towards neck band, ch1, work 2sc in each dc row end to first neck corner, work 3dc in corner st, sc in each st around neck, 3sc in next corner sp, 2sc in each dc row end to next corner, 3sc in corner sp, sc in each st to last corner, 3sc in last corner, join with a sl st, fasten off and sew in ends.
To work sleeves, make sure you working in the opposite direction to previous yoke row!
1. Join with a sl st in one of the ch sps under arms, ch2, dc in same sp, dc2tog across dc row end and marked st (remove marker), dc in each st around to marked st, work dc2tog across marked st and dc row end, dc in other ch sp, sl st to join round, turn. (33)
2-19: ch2, dc in each st around, join with a sl st in top of first st of round, turn (33)
Fasten off, weave in ends, sew on buttons! There are no buttonholes in this pattern, just use the holes in the fabric.
Wednesday, 10 September 2014
Draco Shawl
It's been a while since I posted, but I have a good excuse: I accidentally came up with a new pattern! As so often happens with me, I was messing around with one idea and ended up with something completely different to what I had intended. Completely and marvellously different. I have had a touch of the Willy Wonka creativity with this one!
So, I crocheted my way through my original draft, thinking first that I would end up with a triangle, then that I would have a parallelogram on my hands. I got my husband to help me stretch it to check it would be long enough post blocking... Then I blocked it and was totally surprised by the shape!
The kids decided it looked like a dragon wing. I hadn't written down the pattern. I would need to make another one.
So I did. Only I have been beading a lot of my shawls recently and considered how I might bead this one. At first I thought I should just do the tips of the points but hey I had a lot of beads... maybe I should try something different...
So I crocheted and wrote down what I did. The beading took aaages until it dawned on me I should probably just get a really tiny crochet hook. The project sped right up and I was finished in a week! I'm so glad I chose a yarn with silk in, the drape was much better in the second version of the shawl.
So, I crocheted my way through my original draft, thinking first that I would end up with a triangle, then that I would have a parallelogram on my hands. I got my husband to help me stretch it to check it would be long enough post blocking... Then I blocked it and was totally surprised by the shape!
The kids decided it looked like a dragon wing. I hadn't written down the pattern. I would need to make another one.
So I did. Only I have been beading a lot of my shawls recently and considered how I might bead this one. At first I thought I should just do the tips of the points but hey I had a lot of beads... maybe I should try something different...
So I crocheted and wrote down what I did. The beading took aaages until it dawned on me I should probably just get a really tiny crochet hook. The project sped right up and I was finished in a week! I'm so glad I chose a yarn with silk in, the drape was much better in the second version of the shawl.
So that's what I did this summer! The pattern has now been tested over on Ravelry and is available with 25% off for a couple more days (till Friday), Draco Shawl . The price will then be going up to £2. Follow the link to see my testers projects, they've chosen some awesome colour combinations!
The pattern has been my most popular to date and I've learnt a new skill - charts in excel! I've also made a third version with matching yarn and beads:
The pattern is also available in my etsy store: RedcloverCrochet at the full price of £2Monday, 2 June 2014
Tri Cowl
I was recently working on testing a pattern for the lovely Aoibhe Ni on ravelry and took the opportunity to go stash diving in search of some yarn for the project (read I have no cash to go yarn shopping - woe is me!) and discovered a bundle of stylecraft merino I had bought on sale several years ago. I have not stopped crocheting with it for a week or more and it has been turned into a tank top, a slouchy hat, and this cowl. I had only 1 ball of the red I've used here so I decided a colourwork cowl was in order to stretch it out into a whole project. I ended up stretching it out so far that I am now working on matching mitts (pattern to follow!).
The measurements for this cowl are 24" around and 5.5" deep, this can be adjusted by changing the length of the starting ch, as long as you start with an even number on the chain, the pattern should work fine!
So, for this project you will need:
50g dk weight yarn x 3 - in 3 different colours you think would look good together, I've gone for quite a loud combo of gunmetal grey (main colour MC), deep red (CC1) and cream (CC2), but I think this could look good in tonal shades too :)
(My original yarn is Pure Luxury Merino by Stylecraft 119m/130yds per 50g ball, long since discontinued :( A similar yarn to try would be Debbie Bliss' Cashmerino dk)
5mm hook
Stitches used: Nothing too fancy, this is all sc and ch, but you will need to change colour at the end of each round by working the last YO and pull through in the next colour.
1. In MC, ch120, sc in 2nd ch from hook and each ch across, changing to CC1 in last st (119)
(like the autumnal cowl, this could be worked in the round by joining the foundation ch with a sl. st and working in a continuous spiral, but as I like to work into the bottom bump for the sake of neatness I always end up with a twisted ch that I can never rectify no matter how many times I rip out my work and re-try!)
2. Ch1, and without turning, check your work is not twisted and join to form a circle by working a sc in 2nd sc of row one (skip the first). *Ch1, sk1, sc* around, changing to CC2 in last st of round
For this pattern, to keep the colour changes neat, on every second row I worked the last sc of the round into the first ch of the round in the same colour, this 'stepped' the colour changes and kept them in a straight line.
3. *Ch1, sk 1, sc* around, changing back to MC in last stitch of round
Continue in pattern until you have 30 rows completed (10 complete bands of each colour), in last stitch change to MC
31. In MC, sc in each ch sp and each sc around, sl st to join round, fasten off and weave in ends.
The measurements for this cowl are 24" around and 5.5" deep, this can be adjusted by changing the length of the starting ch, as long as you start with an even number on the chain, the pattern should work fine!
So, for this project you will need:
50g dk weight yarn x 3 - in 3 different colours you think would look good together, I've gone for quite a loud combo of gunmetal grey (main colour MC), deep red (CC1) and cream (CC2), but I think this could look good in tonal shades too :)
(My original yarn is Pure Luxury Merino by Stylecraft 119m/130yds per 50g ball, long since discontinued :( A similar yarn to try would be Debbie Bliss' Cashmerino dk)
5mm hook
Stitches used: Nothing too fancy, this is all sc and ch, but you will need to change colour at the end of each round by working the last YO and pull through in the next colour.
1. In MC, ch120, sc in 2nd ch from hook and each ch across, changing to CC1 in last st (119)
(like the autumnal cowl, this could be worked in the round by joining the foundation ch with a sl. st and working in a continuous spiral, but as I like to work into the bottom bump for the sake of neatness I always end up with a twisted ch that I can never rectify no matter how many times I rip out my work and re-try!)
2. Ch1, and without turning, check your work is not twisted and join to form a circle by working a sc in 2nd sc of row one (skip the first). *Ch1, sk1, sc* around, changing to CC2 in last st of round
For this pattern, to keep the colour changes neat, on every second row I worked the last sc of the round into the first ch of the round in the same colour, this 'stepped' the colour changes and kept them in a straight line.
3. *Ch1, sk 1, sc* around, changing back to MC in last stitch of round
Continue in pattern until you have 30 rows completed (10 complete bands of each colour), in last stitch change to MC
31. In MC, sc in each ch sp and each sc around, sl st to join round, fasten off and weave in ends.
XXXXXXXXXXXXXX
XOXOXOXOXOXOXO
OXOXOXOXOXOXOX
XXXXXXXXXXXXXX
* * * * * * * * * * * * * *
Thursday, 24 April 2014
The Birthday Gift
A work colleague is celebrating her 50th birthday and I wanted to make her a gift. As we are heading towards summer it needed to be something lightweight but I'd left it too late for a shawl. I had a look through some patterns online, but none were quite what I wanted. So I started experimenting. As I have yet to give her the present (and because it's not finished yet!) pics of the finished cowl will follow. I've put the pattern up while I have a quiet 5 minutes - please feel free to grab up a hook and some yarn and try out the pattern :) I will be adding a ravelry link next week!
Finished size is around 34" around and 7" deep (approx! I'm not finished making mine yet!)
You will need:
Around 25g laceweight yarn (200m)
4mm hook
A little patience!
V st: dc, ch1, dc in same st
1. Ch146 (or starting chain can be a multiple of 4 + 2 for the turning chain).
You may want to FSC (foundation sc) 144 here if working into a long laceweight chain is likely to send you over the edge! You may also prefer to join starting chain and work as a round straight off, in which case you will need to drop the ch2 and start with ch144 :)
2. dc in 3rd ch from hook (ch 2 does not count as stitch), *sk ch sp, V st, sk ch sp, dc* along ch, ending on a V st. Leave last ch unworked and end with a sl st in top of first dc of the row to join into a round (careful not to twist!).
3. ch2 (doesn't count as a st), 3dc in first dc, *sc in ch sp of Vst, 5 dc in next dc* around, ending with a sc in ch sp of last 5 st. To complete the round work 2 dc in the same st as the beginning 3 dc were made and join with a sl st.
4. ch1, sc in first st, *ch2, sk 2, dc in sc of previous round, ch2, sk2, sc in middle dc of shell* around, ending with dc in last sc, ch2, join with a sl st to first sc made.
5. Repeat row 2
6. Repeat row 3
7. Repeat row 4
Repeat rows 2-4 as required and end on a row 4. Fasten off and block as needed. When sewing in the ends, for the starting chain stray end, be sure to join the gap created if you have followed the pattern as written (starting with rows and joining to rounds).
If you started with an FSC row you may want to do a final row of sc around for balance.
I am still in the midst of my cowl but I think I will end up with 7 rows of shells.
Here is an in progress shot of what I have so far:
Finished size is around 34" around and 7" deep (approx! I'm not finished making mine yet!)
You will need:
Around 25g laceweight yarn (200m)
4mm hook
A little patience!
V st: dc, ch1, dc in same st
1. Ch146 (or starting chain can be a multiple of 4 + 2 for the turning chain).
You may want to FSC (foundation sc) 144 here if working into a long laceweight chain is likely to send you over the edge! You may also prefer to join starting chain and work as a round straight off, in which case you will need to drop the ch2 and start with ch144 :)
2. dc in 3rd ch from hook (ch 2 does not count as stitch), *sk ch sp, V st, sk ch sp, dc* along ch, ending on a V st. Leave last ch unworked and end with a sl st in top of first dc of the row to join into a round (careful not to twist!).
3. ch2 (doesn't count as a st), 3dc in first dc, *sc in ch sp of Vst, 5 dc in next dc* around, ending with a sc in ch sp of last 5 st. To complete the round work 2 dc in the same st as the beginning 3 dc were made and join with a sl st.
4. ch1, sc in first st, *ch2, sk 2, dc in sc of previous round, ch2, sk2, sc in middle dc of shell* around, ending with dc in last sc, ch2, join with a sl st to first sc made.
5. Repeat row 2
6. Repeat row 3
7. Repeat row 4
Repeat rows 2-4 as required and end on a row 4. Fasten off and block as needed. When sewing in the ends, for the starting chain stray end, be sure to join the gap created if you have followed the pattern as written (starting with rows and joining to rounds).
If you started with an FSC row you may want to do a final row of sc around for balance.
I am still in the midst of my cowl but I think I will end up with 7 rows of shells.
Here is an in progress shot of what I have so far:
The Finished Article :)
I ended up with 7 rows of shells and ended on a round 4 pattern repeat. The finished cowl was 24g.
Wednesday, 2 April 2014
Summer Daisy Beach Bag
In a few short weeks I will be doing my first Summer craft fair at Ickwell's May Day event. I knew I would need to come up with something a little less woolly than what I would sell at a Winter fair, so I've been working on a few cotton bags. This one uses 75g of dk weight cotton (King Cole cottonsoft Khaki) plus some dk scraps from other projects to make up the daisy. The finished bag is approx 8" (20cm) deep, 10" (25cm) wide.
The project size can be easily adjusted by changing the length of the starting chain or working extra repeats of the pattern (remember to adjust yarn quantities though!)
You Will Need:
Approx 75g (150+ m) dk weight cotton or similar, plus scraps for the flower
4.5mm hook
3.5mm hook (optional, I used a smaller hook for the petals of the daisy)
2 stitch markers
Needle
1. Ch 17, 3dc in 3rd ch from hook, dc in next 13, 6dc in last ch pivoting as you work as you will be working along other side of chain (mark first st in group), dc in next 13 along underside of chain, 3dc in last ch (mark first st of this group), join with sl.st in top of first dc made. (38 sts).
2. Ch2, work 2dc in first 3 sts, dc in next 13, 2dc in marked st (move marker up to first st in this pair), 2dc in next 5 sts, dc in next 13, 2dc in marked st (move marker up as before), 2dc in last 2 sts, sl st in top of first dc (50)
3. Ch2, [2dc, dc] 3 times, dc in next 13, [2dc, dc] 6 times from marked st, move marker up, dc in next 13, [2dc, dc] 3 times from marked st, move marker up, sl st in top of first dc (62)
4. Ch2, [2dc, dc, dc] 3 times, dc in next 13, [2dc, dc, dc] 6 times from marked st, move marker up, dc in next 13, [2dc, dc, dc] 3 times from marked st, move marker up, sl st in top of first dc (74)
The bottom of the bag is now done and there are no more increases. Now work the sides of the bag:
5. Ch2, dc in first st and each st around, sl st in top of first dc (74)
6 + 7: Repeat row 5 (74)
8. Ch1, sc in first st and each st around, sl st in top of first st (74)
9, 10, 11: Repeat row 5
12: Repeat row 8
13, 14, 15: Repeat row 5
16: Repeat row 8
17, 18, 19: Repeat row 5
20, 21, 22, 23, 24: Repeat row 8. Fasten off and weave in ends.
Handles (make 2)
1. Ch6, sc in 2nd ch from hook and each st across, turn (5)
2. Ch1, sc across, turn
3. Repeat row 2
4. Ch2, dc in each st across, turn
5, 6, 7: Repeat row 2
8. Repeat row 4
Repeat in this pattern of 3 rows of sc, 1 row of dc, until you have the size handles you need. Be sure to end with 3 rows of sc. My handles are 39 rows. Fasten off and sew inside on the sc section at the top.
Flower:
With 4.5mm hook and yellow yarn, begin with a magic ring (or ch2 and work in 2nd ch from hook)
Work 14 sc and sl st in top of first st made. Pull magic ring tight.
Fasten off yellow and move to smaller hook (optional) and white yarn.
Join with a sc into one of the stitches in the ring, ch10, sc in same stitch.
Work [sc, ch12, sc], then [sc, ch10, sc] alternately into each st around, sl st in first sc made and fasten off leaving a tail long enough to sew flower onto bag. Ta-da!!
Don't forget to post your finished projects on Ravelry !
The project size can be easily adjusted by changing the length of the starting chain or working extra repeats of the pattern (remember to adjust yarn quantities though!)
You Will Need:
Approx 75g (150+ m) dk weight cotton or similar, plus scraps for the flower
4.5mm hook
3.5mm hook (optional, I used a smaller hook for the petals of the daisy)
2 stitch markers
Needle
1. Ch 17, 3dc in 3rd ch from hook, dc in next 13, 6dc in last ch pivoting as you work as you will be working along other side of chain (mark first st in group), dc in next 13 along underside of chain, 3dc in last ch (mark first st of this group), join with sl.st in top of first dc made. (38 sts).
2. Ch2, work 2dc in first 3 sts, dc in next 13, 2dc in marked st (move marker up to first st in this pair), 2dc in next 5 sts, dc in next 13, 2dc in marked st (move marker up as before), 2dc in last 2 sts, sl st in top of first dc (50)
3. Ch2, [2dc, dc] 3 times, dc in next 13, [2dc, dc] 6 times from marked st, move marker up, dc in next 13, [2dc, dc] 3 times from marked st, move marker up, sl st in top of first dc (62)
4. Ch2, [2dc, dc, dc] 3 times, dc in next 13, [2dc, dc, dc] 6 times from marked st, move marker up, dc in next 13, [2dc, dc, dc] 3 times from marked st, move marker up, sl st in top of first dc (74)
The bottom of the bag is now done and there are no more increases. Now work the sides of the bag:
5. Ch2, dc in first st and each st around, sl st in top of first dc (74)
6 + 7: Repeat row 5 (74)
8. Ch1, sc in first st and each st around, sl st in top of first st (74)
9, 10, 11: Repeat row 5
12: Repeat row 8
13, 14, 15: Repeat row 5
16: Repeat row 8
17, 18, 19: Repeat row 5
20, 21, 22, 23, 24: Repeat row 8. Fasten off and weave in ends.
Handles (make 2)
1. Ch6, sc in 2nd ch from hook and each st across, turn (5)
2. Ch1, sc across, turn
3. Repeat row 2
4. Ch2, dc in each st across, turn
5, 6, 7: Repeat row 2
8. Repeat row 4
Repeat in this pattern of 3 rows of sc, 1 row of dc, until you have the size handles you need. Be sure to end with 3 rows of sc. My handles are 39 rows. Fasten off and sew inside on the sc section at the top.
Flower:
With 4.5mm hook and yellow yarn, begin with a magic ring (or ch2 and work in 2nd ch from hook)
Work 14 sc and sl st in top of first st made. Pull magic ring tight.
Fasten off yellow and move to smaller hook (optional) and white yarn.
Join with a sc into one of the stitches in the ring, ch10, sc in same stitch.
Work [sc, ch12, sc], then [sc, ch10, sc] alternately into each st around, sl st in first sc made and fasten off leaving a tail long enough to sew flower onto bag. Ta-da!!
Don't forget to post your finished projects on Ravelry !
Tuesday, 4 March 2014
Galaxy Scarf
While in my LYS before Christmas, I bought 2 skeins of King Cole Galaxy. Not something I would usually buy but I wanted to make a slightly sparkly gift without all the concentration and time needed when using beads. This yarn is perfect for the job as it is 'pre-sequinned' (is that even a term?!) so I caved in and bought it!
This is what I came up with:
Here's what I did:
6.5mm hook
2 x 50g King Cole Galaxy
Stitch marker
I worked the flat section in the middle in rows, back and forth. For the ruffle, I worked in a continuous round around the outside until I was happy with the level of ruffliness, in my case 5 rows.
The finished scarf is 52", for a longer scarf start with a longer chain, making sure it is an even number. (Make sure you have enough yarn!)
Loosely ch 180
1. Sc in 2nd ch from the hook, *ch1, sk1, sc* to end, turn (179)
2. Ch1, *sc in sc, ch1, sk ch sp* across, sc in last, turn (179)
3 - 14: Repeat row 2
You will now work in rounds, a stitch marker is placed in the first st so you don't get lost! These are continuous rounds that you don't need to join.
You will turn your work to begin working in the short side. You will need to work *sc, ch1* across this short side, working each sc in the corresponding row end (14 sc made, 13 ch sps) - from now on you won't be skipping any ch sps, they will all be worked in .
Rnd 1: Ch1 and pivot your work, *sc, ch1* along the first short side in the end of each row, ch1 and turn to work along the bottom, *sc, ch1* across the length of this row, ch1 and turn to work across the short side being sure to work 14 sc into this end too! *sc, ch1* across short side, ch1 and turn to work along the top, *sc, ch1* in all sc and ch sp, along to the marked st.
Rnd 2-5: continue in *sc, ch1* pattern for another 4 rounds or more if wanted, moving the marker up to keep track of the rounds. Each round should be double the stitch count of the last, creating the ruffled effect.
Weave in the ends and wear or gift :)
This is what I came up with:
Here's what I did:
6.5mm hook
2 x 50g King Cole Galaxy
Stitch marker
I worked the flat section in the middle in rows, back and forth. For the ruffle, I worked in a continuous round around the outside until I was happy with the level of ruffliness, in my case 5 rows.
The finished scarf is 52", for a longer scarf start with a longer chain, making sure it is an even number. (Make sure you have enough yarn!)
Loosely ch 180
1. Sc in 2nd ch from the hook, *ch1, sk1, sc* to end, turn (179)
2. Ch1, *sc in sc, ch1, sk ch sp* across, sc in last, turn (179)
3 - 14: Repeat row 2
You will now work in rounds, a stitch marker is placed in the first st so you don't get lost! These are continuous rounds that you don't need to join.
You will turn your work to begin working in the short side. You will need to work *sc, ch1* across this short side, working each sc in the corresponding row end (14 sc made, 13 ch sps) - from now on you won't be skipping any ch sps, they will all be worked in .
Rnd 1: Ch1 and pivot your work, *sc, ch1* along the first short side in the end of each row, ch1 and turn to work along the bottom, *sc, ch1* across the length of this row, ch1 and turn to work across the short side being sure to work 14 sc into this end too! *sc, ch1* across short side, ch1 and turn to work along the top, *sc, ch1* in all sc and ch sp, along to the marked st.
Rnd 2-5: continue in *sc, ch1* pattern for another 4 rounds or more if wanted, moving the marker up to keep track of the rounds. Each round should be double the stitch count of the last, creating the ruffled effect.
Weave in the ends and wear or gift :)
Sunday, 9 February 2014
Sari Silk Scarflette
While I was up in Haworth, North Yorkshire a couple of summers ago visiting family, I wandered off the cobbled street and into a fairtrade shop. Among the incense and fair trade clothes I found a basket of fair trade recycled sari silk skeins. I bought one which has been in my stash ever since due to a lack of inspiration. I loved the jewel colours but at the time I was taking on more challenging patterns and didn't want to work the plain stitches that would be needed so as not to lose the texture and colour of the silks.
Fast forward to this weekend and I stumbled across the silk yarn again. I had half an idea to use the birch bark cowl pattern but I quickly realised it would be tricky to work into the chain spaces so I went with this pattern instead.
My finished scarflette measures 32" x 5" approx. Keep an eye on the amount of yarn you have left as you come towards the last row, you may need to drop one of the repeats so you don't run out of yarn!
You Will Need:
1. sc in 2nd ch from hook and each ch across, turn (99)
2. ch1, sc in first st, *ch1, sk 1, sc* across to last, turn
3. Ch1, sc in first st, *ch1, sk ch sp, sc in sc* across to last, turn
Repeat row 3 for 13 more rows
17. Ch1, sc in each sc and ch sp across to end, fasten off and weave in ends.
Sew on button as wanted and wear!
Fast forward to this weekend and I stumbled across the silk yarn again. I had half an idea to use the birch bark cowl pattern but I quickly realised it would be tricky to work into the chain spaces so I went with this pattern instead.
My finished scarflette measures 32" x 5" approx. Keep an eye on the amount of yarn you have left as you come towards the last row, you may need to drop one of the repeats so you don't run out of yarn!
You Will Need:
- 100g sari yarn. Mine looks to be dk/worsted weight but I don't know the yardage, sorry!
- 6mm hook
- button to finish, this will need to fit through one of the gaps created by the ch sp
1. sc in 2nd ch from hook and each ch across, turn (99)
2. ch1, sc in first st, *ch1, sk 1, sc* across to last, turn
3. Ch1, sc in first st, *ch1, sk ch sp, sc in sc* across to last, turn
Repeat row 3 for 13 more rows
17. Ch1, sc in each sc and ch sp across to end, fasten off and weave in ends.
Sew on button as wanted and wear!
Monday, 6 January 2014
Lilac cowl
So I got some gorgeous bulky weight alpaca in the sale from wharfedale woolworks and I wanted a quick project that I could pick up and put down without too much thought while the kids were still on holiday from school. I wanted to make a larger version of my birchbark cowl, this pattern uses the same stitch pattern but a larger hook to make the fabric more floaty.
Finished cowl measures approx 30" x 6"
You will need:
100g (100m/110yds) bulky weight (12 ply) alpaca
9mm hook (M/N)
3 x 1 - 1.5" buttons
1. Ch71, sc in 2nd ch from hook and each ch across, turn
2. Ch1, sc, (ch1, sk1, sc) across, turn.
3. Ch1, sc in 1st st, (sc in ch sp, ch1, sk sc)across, sc in last 2 st, turn.
Repeat rows 2 and 3 for 17 more rows (or until cowl is size needed).
21. Ch1, sc in each sc and ch sp across, fasten off.
Weave in ends, sew on buttons on both corners of the short side and check placement of third button before attaching. There are no buttonholes for this project, the buttons need to be able to slip through the holes made in the fabric. Block if needed.
Finished cowl measures approx 30" x 6"
You will need:
100g (100m/110yds) bulky weight (12 ply) alpaca
9mm hook (M/N)
3 x 1 - 1.5" buttons
1. Ch71, sc in 2nd ch from hook and each ch across, turn
2. Ch1, sc, (ch1, sk1, sc) across, turn.
3. Ch1, sc in 1st st, (sc in ch sp, ch1, sk sc)across, sc in last 2 st, turn.
Repeat rows 2 and 3 for 17 more rows (or until cowl is size needed).
21. Ch1, sc in each sc and ch sp across, fasten off.
Weave in ends, sew on buttons on both corners of the short side and check placement of third button before attaching. There are no buttonholes for this project, the buttons need to be able to slip through the holes made in the fabric. Block if needed.
Tuesday, 17 December 2013
Flaming Beanie
Back in the summer I did a local craft fair and sold a one-off hat I'd made with some left over merino I'd got from Wharfedale Woolworks . I'd meant to write down the pattern but hadn't got around to it but I had a vague idea how I'd gone about it... Fast forward to December and I got a message from the person who'd bought the hat wanting me to make another one for her. I asked the customer to send me a pic and set to work making this:
It took 3 attempts to remember what exactly I'd done, so I wrote it down this time in case I need to make it again!
You will need: 100g dk weight main colour (I used King Cole merino blend Heather),
50g contrast colour (CC) (King cole merino blend dusky pink),
4.5mm Hook
Stitch markers
This pattern is for a 20" circ hat, it fits quite snugly because it uses tapestry crochet. To make a larger or smaller hat, add or take away increase rounds, 6 sc = 1 1/2 "
This pattern uses tapestry crochet where you carry the colour not being worked underneath and stitch it into your work as you go. It is important to not carry the yarn too tightly so that your hat still has some give in it when you wear it. If you need some info on the technique have a look on you tube, there are lots of great tutorials :)
1. Ch2, in 2nd ch from hook work 6sc
2. (You will be working in a continuous spiral, place marker in first stitch of this round and move marker up to the first stitch of each new round), 2sc in each sc around (12)
3. *2sc, sc* around (18)
4. *2sc, sc in next 2 sts* around (24)
5. *2sc, sc in next 3 sts* around (30)
6. *2sc, sc in next 4 sts* around (36)
7. *2sc, sc in next 5 sts* around (42)
8. *2sc, sc in next 6 sts* around (48)
9. *2sc, sc in next 7 sts* around (54)
10. *2sc, sc in next 8 sts* around (60)
11. Sc in each st around (60)
12. *2sc, sc in next 9 sts* around (66)
13. sc in each st around
14. *2sc, sc in next 10 sts* around (72)
15. sc in each st around
16. *2sc, sc in next 11 sts* around (78)
17. sc in each st around
18. *2sc, sc in next 12 sts* around (84)
19. sc in each st around
20. *2sc, sc in next 13 sts* around (90)
21 - 37: sc around
38: In this round the pink is added. Carry the CC yarn under the stitches and pick it up and swap it to work stitch in every six in pink. It may be helpful to mark out every six stitches to keep track of where you are - I added a stitch marker in every 12 stitches. What I did was to randomly put in a pink stitch in each group of 6. Randomly work from these combinations:
(sc in next 5 changing to CC in last st worked, sc CC in last st changing to MC)
(sc in next 4 changing to CC in last st worked, sc CC in 5th st changing to MC, sc in last)
(sc in next 3 changing to CC in last st worked, sc CC in 4th st changing to MC, sc in next 2)
(sc in next 2 changing to CC in last st worked, sc CC in 3rd st changing to MC, sc in next 3)
(sc in first st changing to CC in last st worked, sc CC in 2nd st changing to MC, sc in next 4)
(sc in first st changing to MC in last st worked, sc in next 5 st)
39: Continuing in the same fashion, in this round you will need to fill in 2 sts in every 6 using the CC - some of these might be 2 sts next door to each other, some separated by one or more sts
40. 3 in every six sts to be filled in using CC
41. 4 in every six sts to be filled in using CC
42. 5 in every six sts to be filled in using CC
43 - 47: sc around. Check sizing by trying hat on (my hat measured approx 8" crown to brim), if you need to make it a bit bigger, add a few more rounds in the CC. Once you are happy, work round to the stitch marker marking the first st of the round, sl st in the next 2 sts and fasten off.
Weave in ends and wear! Don't forget to post project pics on ravelry, I'd love to see what colour combos you come up with. You could also try thsi hat in 3 (or more) colours by following the same method to fade into another colour...
It took 3 attempts to remember what exactly I'd done, so I wrote it down this time in case I need to make it again!
You will need: 100g dk weight main colour (I used King Cole merino blend Heather),
50g contrast colour (CC) (King cole merino blend dusky pink),
4.5mm Hook
Stitch markers
This pattern is for a 20" circ hat, it fits quite snugly because it uses tapestry crochet. To make a larger or smaller hat, add or take away increase rounds, 6 sc = 1 1/2 "
This pattern uses tapestry crochet where you carry the colour not being worked underneath and stitch it into your work as you go. It is important to not carry the yarn too tightly so that your hat still has some give in it when you wear it. If you need some info on the technique have a look on you tube, there are lots of great tutorials :)
1. Ch2, in 2nd ch from hook work 6sc
2. (You will be working in a continuous spiral, place marker in first stitch of this round and move marker up to the first stitch of each new round), 2sc in each sc around (12)
3. *2sc, sc* around (18)
4. *2sc, sc in next 2 sts* around (24)
5. *2sc, sc in next 3 sts* around (30)
6. *2sc, sc in next 4 sts* around (36)
7. *2sc, sc in next 5 sts* around (42)
8. *2sc, sc in next 6 sts* around (48)
9. *2sc, sc in next 7 sts* around (54)
10. *2sc, sc in next 8 sts* around (60)
11. Sc in each st around (60)
12. *2sc, sc in next 9 sts* around (66)
13. sc in each st around
14. *2sc, sc in next 10 sts* around (72)
15. sc in each st around
16. *2sc, sc in next 11 sts* around (78)
17. sc in each st around
18. *2sc, sc in next 12 sts* around (84)
19. sc in each st around
20. *2sc, sc in next 13 sts* around (90)
21 - 37: sc around
38: In this round the pink is added. Carry the CC yarn under the stitches and pick it up and swap it to work stitch in every six in pink. It may be helpful to mark out every six stitches to keep track of where you are - I added a stitch marker in every 12 stitches. What I did was to randomly put in a pink stitch in each group of 6. Randomly work from these combinations:
(sc in next 5 changing to CC in last st worked, sc CC in last st changing to MC)
(sc in next 4 changing to CC in last st worked, sc CC in 5th st changing to MC, sc in last)
(sc in next 3 changing to CC in last st worked, sc CC in 4th st changing to MC, sc in next 2)
(sc in next 2 changing to CC in last st worked, sc CC in 3rd st changing to MC, sc in next 3)
(sc in first st changing to CC in last st worked, sc CC in 2nd st changing to MC, sc in next 4)
(sc in first st changing to MC in last st worked, sc in next 5 st)
39: Continuing in the same fashion, in this round you will need to fill in 2 sts in every 6 using the CC - some of these might be 2 sts next door to each other, some separated by one or more sts
40. 3 in every six sts to be filled in using CC
41. 4 in every six sts to be filled in using CC
42. 5 in every six sts to be filled in using CC
43 - 47: sc around. Check sizing by trying hat on (my hat measured approx 8" crown to brim), if you need to make it a bit bigger, add a few more rounds in the CC. Once you are happy, work round to the stitch marker marking the first st of the round, sl st in the next 2 sts and fasten off.
Weave in ends and wear! Don't forget to post project pics on ravelry, I'd love to see what colour combos you come up with. You could also try thsi hat in 3 (or more) colours by following the same method to fade into another colour...
Friday, 18 October 2013
Orange
Such an underrated colour! One of the lovely testers for my steampunk mitts pattern, Denvermama, made hers in a gorgeous orange, and I promised myself once I'd done my tax return (yawn...) I'd treat myself to a skein or two (or three!).
And so it was that I ended up trawling the latest offerings from Fyberspates. And this is what I got, ta-da!
Totally gorgeous, especially against the silver :) FYI (and because I like to be an enabler on occasion) these are both Twizzle 4 ply, in silver and burnt orange.
Now, these yarns were supposed to be earmarked for some more steampunk mitts for a craft fair I'm doing in December. Instead I have seconded them to the shawl department and I'm planning on a stripy version of my Urban Shawl pattern. If there's any left over after that I shall make some mitts!
And so it was that I ended up trawling the latest offerings from Fyberspates. And this is what I got, ta-da!
Totally gorgeous, especially against the silver :) FYI (and because I like to be an enabler on occasion) these are both Twizzle 4 ply, in silver and burnt orange.
Now, these yarns were supposed to be earmarked for some more steampunk mitts for a craft fair I'm doing in December. Instead I have seconded them to the shawl department and I'm planning on a stripy version of my Urban Shawl pattern. If there's any left over after that I shall make some mitts!
Tuesday, 1 October 2013
steampunk mitts/cuffs
I've now released the pattern - it's available for free for a short time only in my ravelry store after which the pattern will be on sale for the very reasonable price of £1. They come in 2 sizes and can be finished as either mitts or cuffs. They are also super-quick to make - great for stash busting as well as last minute gifts - I'm planning to make up a few pairs for Christmas gifts this year. I'm also going to experiment with some hand dyed yarn and see what happens...!
My testers are putting their projects up on ravelry for this pattern - they've all enjoyed making this pattern too - check out their projects on this here page!
Wednesday, 25 September 2013
How could I forget?!
I've also released Marcus' snood pattern on ravelry here - what a handsome pup! It's a free pattern but I'm asking people to make a small donation to GRWE if they like the pattern.
I will be revisiting the pattern over the coming months and adding some other sizes hopefully, I'm not sure whether to fiddle around with the pattern itself or sub in and out with different yarn weights and hooks...
MrJoeyGrey - I am unable to reply to your question in comments, I have been trying all weekend but no luck! In answer to your question, after you have worked into the last stitch of the short row, the next stitch along will need you to drop down to the longer row. If you don't pick up an extra loop you will end up with a small hole in the fabric.
To pick up a loop and close the gap, push your hook through one of the strands in the side of the short rows and pull up a loop, keep this loop on the hook and drop down and pick up a loop (sc) as you normally would, from the next stitch. Yarn over and pull through all 3 loops on the hook. Essentially what you are doing is working a sc2tog, so you are not increasing the stitch count, just closing the gap.
I hope this makes sense and I look forward to seeing your project! If you need any more help please feel free to comment on my post, or pm me on ravelry (redclover) so I can reply directly!
I will be revisiting the pattern over the coming months and adding some other sizes hopefully, I'm not sure whether to fiddle around with the pattern itself or sub in and out with different yarn weights and hooks...
MrJoeyGrey - I am unable to reply to your question in comments, I have been trying all weekend but no luck! In answer to your question, after you have worked into the last stitch of the short row, the next stitch along will need you to drop down to the longer row. If you don't pick up an extra loop you will end up with a small hole in the fabric.
To pick up a loop and close the gap, push your hook through one of the strands in the side of the short rows and pull up a loop, keep this loop on the hook and drop down and pick up a loop (sc) as you normally would, from the next stitch. Yarn over and pull through all 3 loops on the hook. Essentially what you are doing is working a sc2tog, so you are not increasing the stitch count, just closing the gap.
I hope this makes sense and I look forward to seeing your project! If you need any more help please feel free to comment on my post, or pm me on ravelry (redclover) so I can reply directly!
after the summer
Well, the kids are definitely back at school. Just me, the dog and the cat now. And while two of our number snore away the day, one of us can usually be found with a hook and a ball of yarn.
I currently have... (counts in head)... 8 wips on the go. As is always the way, I am going through a period where I can't settle on any one thing. I have loads of ideas pinging through my head and not enough hours in the week to get them all done. So I will work on each project a little at a time until I make a decision.
Part of the problem is that I'm all shawled out. I completed the 12 shawls challenge months ago but I still have 4 shawls in progress! One of them is languishing at the bottom of the pile because it requires more concentration than I can give it right now, one is a prototype for a new pattern I am thinking about, one of them is being worked in a pure silk yarn that is forever knotting itself up. The last one is a rework of my p-hop pattern, October Leaves. I am using some left over Fyberspates yarn from 2 other projects - a gorgeous green called Chartreuse that I used in my first Jacob's Ladder Shawlette, and a vibrant purple from Betty's shawl. I like the possibilities of October Leaves - one of my testers did a striped version that I ended up using as the first picture on the pattern. My project will be mainly green with 3 purple stripes (I don't have enough purple left to do any more than that!).
I've been getting a few patterns tested (and re-tested) recently. Firstly, hopscotch cowl:
I've updated the original pattern a little and also written it up using US terms as well as UK. The testers have all added their projects to Ravelry, you can have a look at them all here The pattern is available for £1 for a short time only - available here (discount at checkout!)
Secondly, and still currently being tested are my steampunk mitts. I've borrowed the stitch pattern from springy socks and turned it sideways and hooked it up with the stitch pattern from my yoga socks pattern. I'm thinking that I will probably offer the pattern for free for a few weeks once it is released...
At this rate I will definitely hit my target of having 20 patterns on the ravelry database by the end of the year!
I currently have... (counts in head)... 8 wips on the go. As is always the way, I am going through a period where I can't settle on any one thing. I have loads of ideas pinging through my head and not enough hours in the week to get them all done. So I will work on each project a little at a time until I make a decision.
Part of the problem is that I'm all shawled out. I completed the 12 shawls challenge months ago but I still have 4 shawls in progress! One of them is languishing at the bottom of the pile because it requires more concentration than I can give it right now, one is a prototype for a new pattern I am thinking about, one of them is being worked in a pure silk yarn that is forever knotting itself up. The last one is a rework of my p-hop pattern, October Leaves. I am using some left over Fyberspates yarn from 2 other projects - a gorgeous green called Chartreuse that I used in my first Jacob's Ladder Shawlette, and a vibrant purple from Betty's shawl. I like the possibilities of October Leaves - one of my testers did a striped version that I ended up using as the first picture on the pattern. My project will be mainly green with 3 purple stripes (I don't have enough purple left to do any more than that!).
I've been getting a few patterns tested (and re-tested) recently. Firstly, hopscotch cowl:
I've updated the original pattern a little and also written it up using US terms as well as UK. The testers have all added their projects to Ravelry, you can have a look at them all here The pattern is available for £1 for a short time only - available here (discount at checkout!)
Secondly, and still currently being tested are my steampunk mitts. I've borrowed the stitch pattern from springy socks and turned it sideways and hooked it up with the stitch pattern from my yoga socks pattern. I'm thinking that I will probably offer the pattern for free for a few weeks once it is released...
Finally, I have bitten the bullet and put Betty's shawl up for testing as of yesterday. I'm looking forward to seeing how everyone gets on with the pattern :)
At this rate I will definitely hit my target of having 20 patterns on the ravelry database by the end of the year!
Subscribe to:
Posts (Atom)